DART Workflows
Contents
Integrated system
1. Running CREATE
The DART pipeline deployment tools include a standalone deployment configuration that includes all of the reading and assembly services and thus supports continuous integration through assembly. This deployment configuration, called Causal Relation Extraction and Assembly Toolkit Ensemble (CREATE), can be deployed using the DART command-line interface, DART-CLI.
DART-CLI
To deploy DART, you will need to use DART’s command line toolkit, DART-CLI. DART-CLI is a python application designed to run on OSX and linux environments. It requires python 3.9, and its full functionality requires an installation of ssh and docker. If these requirements are satisfied in your environment, you can install DART-CLI using:
pip3 install dart-cli
To confirm that the installation was successful, run:
dart --version
If you wish to run DART-CLI in an unsupported environment, you can use the dart-cli docker image. To retrieve this image, run:
docker pull twosixlabsdart/dart-cli
The recommended usage of the dart-cli docker image is to open an interactive shell session and executes dart commands within that session. To do so, execute the following, replacing “HOME-DIRECTORY” with the path to your user’s home directory:
docker run -it --rm -v "/var/run/docker.sock:/var/run/docker.sock:ro" -v [HOME-DIRECTORY]:/root twosixlabsdart/dart-cli:latest
This should bring up a command prompt (#). Run dart --version to confirm that it works. By mapping your home directory, dart-cli will be able to persist configuration data across sessions and will have access to your ssh keys, which will be necessary if you are using a remote deployment.
Local Deployment
For a CREATE deployment it is recommended to provide 64 CPUs and 128 Gb memory. If your local machine can support this, you can stand up a local instance of DART using the following command:
dart pipeline deploy --default-env-dir [optional-data-directory]
The --default-env-dir option allows you to choose where DART will persist any data. If you omit this flag it will use your current working directory. Note that if you are running within docker, the data will end up in your user home directory, as long as you have mapped that directory as described above.
To confirm that the deployment worked, navigate to http://localhost in a web browser (preferably chrome). It should eventually load a user interface.
Remote Deployment
DART-CLI can automate remote deployment using ssh. To start a remote deployment, you will need:
- The hostname or IP of a remote linux instance, with ssh access enabled, where you intend to deploy DART. This instance must have docker installed and running.
- The name of an ssh key paired with your remote instance. This key must be saved in the
.sshfolder in your home directory. - The username, used by ssh, to access the remote instance.
The recommended way to deploy dart remotely is to first create a configuration profile which will persist all of the required connection details:
dart --remote [hostname/IP] --ssh-key [ssh-key-name] --default-env-user [ssh-user-name] --default-env-dir [optional-data-directory] profiles add [profile-name]
This will create a profile in a .dart folder within your home directory with all the required parameters (note: --default-env-dir is optional, and allows you to specify where the data will be persisted on the remote instance). Any commands relative to this remote deployment need only include -p [profile-name] to inject these options.
To stand up DART on your remote instance, run the following, substituting the name of your profile created by the previous command::
dart -p [profile-name] pipeline deploy
If you have http access to the remote instance, you can confirm that it works by navigating to http://[hostname-or-IP]. It should eventually load the DART user interface (DART-UI).
2. Tenant Management
Prior to submitting documents, the program manager should decide whether the intended use case demands any logical separation of documents or ontologies. This may be required if multiple unrelated use cases need to be supported in parallel or if a single use case requires considering multiple distinct knowledge bases in isolation with different ontologies for each knowledge base.
Logical groupings of documents and ontologies in DART are called “tenants.” Every DART instance has a “global” tenant, which always consists of every document in the system. By default, the global tenant is the only tenant. To add additional tenants, you can either use DART-CLI or the web-based user interface (DART-UI)
A. Command-line tenant management
To add tenants using DART-CLI, use the following:
dart -p [profile-name] tenants add [tenant-name]
To remove a tenant:
dart -p [profile-name] tenants rm [tenant-name]
To retrieve a current list of available tenants:
dart -p [profile-name] tenants ls
B. Web interface tenant management
To view, add, and remove tenants using DART-UI, navigate to the Manage Tenants tool in DART-UI either by opening the toolbar menu and clicking “Document Upload” or by navigating to [base-url]/tenants where “base-url” is the url specified in Running Dart (above) to confirm that the deployment was successful:
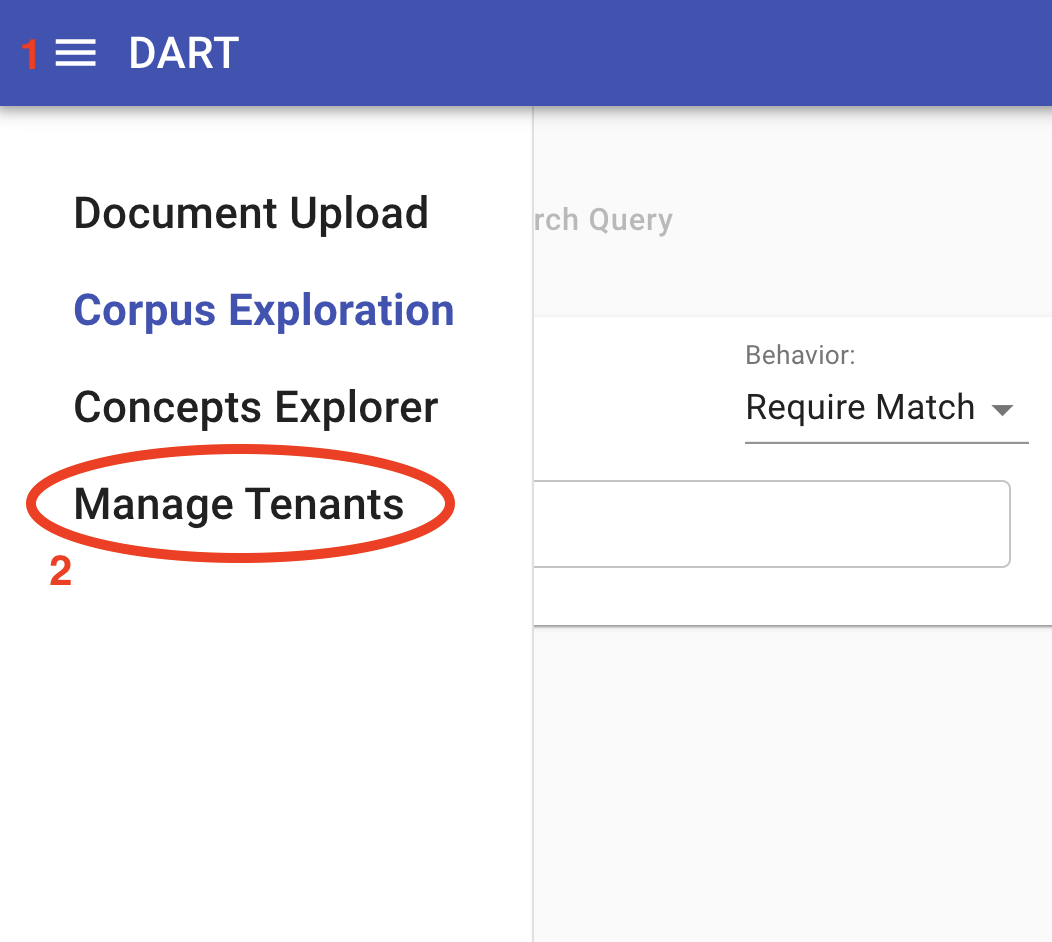
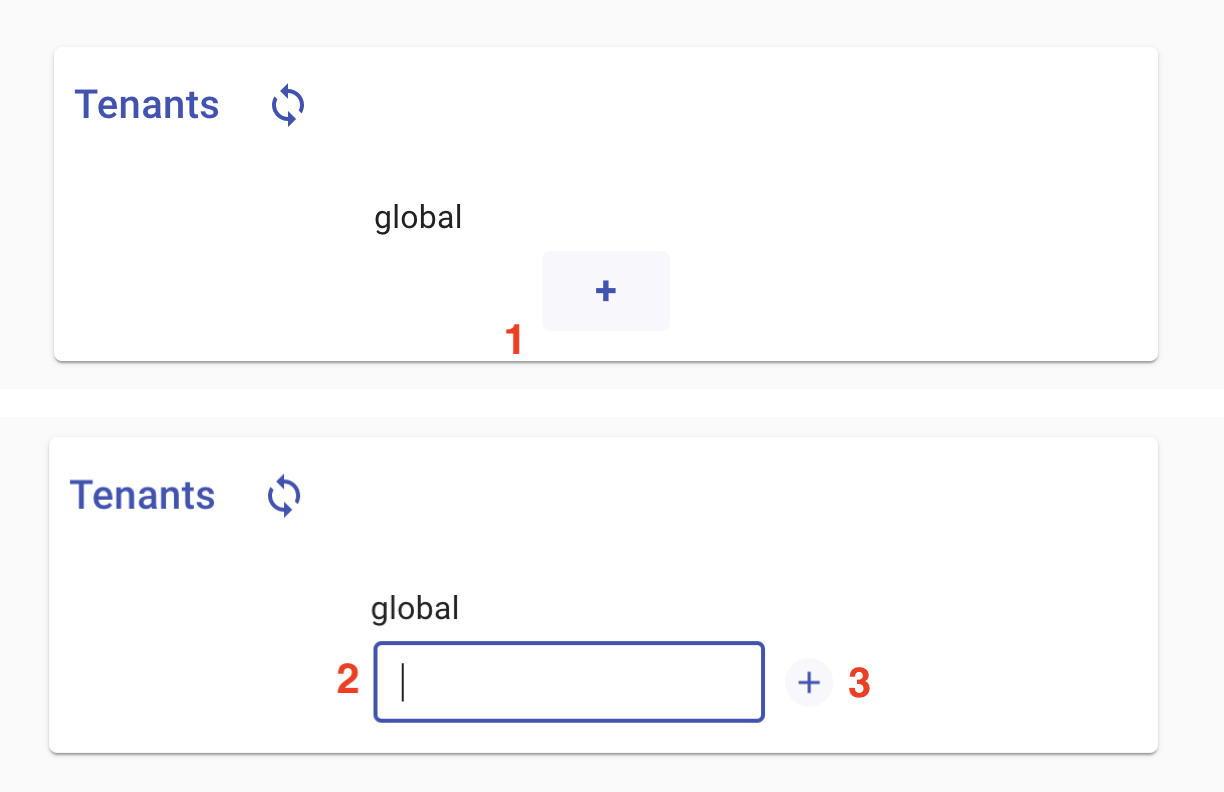
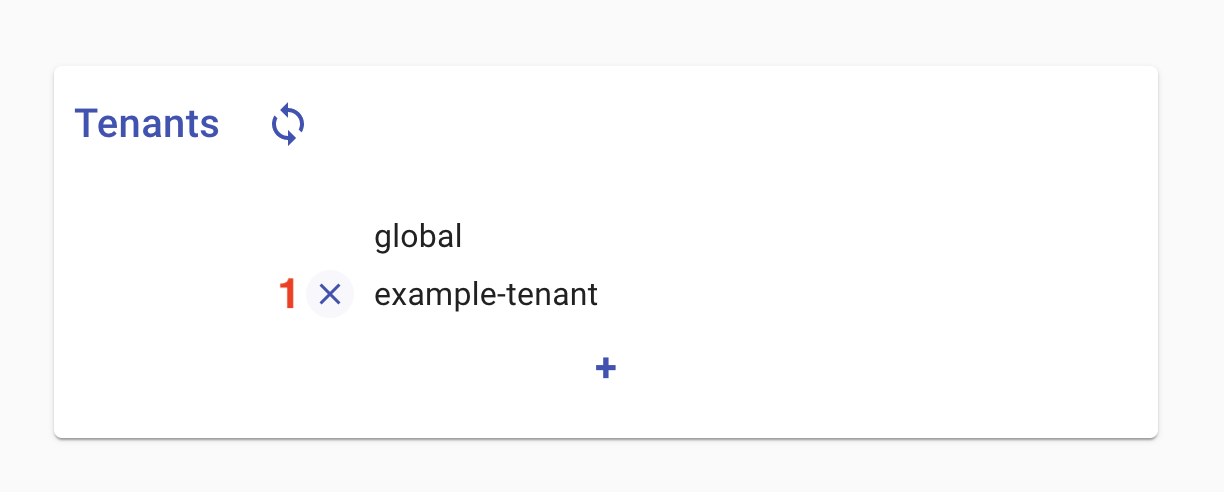
This should bring a simple page with a list of tenants. This should list only “global.” To add tenant, click the + button at the bottom of the list, type in the new tenant name in the text field that appears, and hit “Enter” or click the ??? button to the right of the field. You should see the new appear in the list.
To remove a tenant, hover your mouse over the undesired tenant. A small x button should appear to the left of it. Clicking this button will remove the tenant.
3. Ontology Management
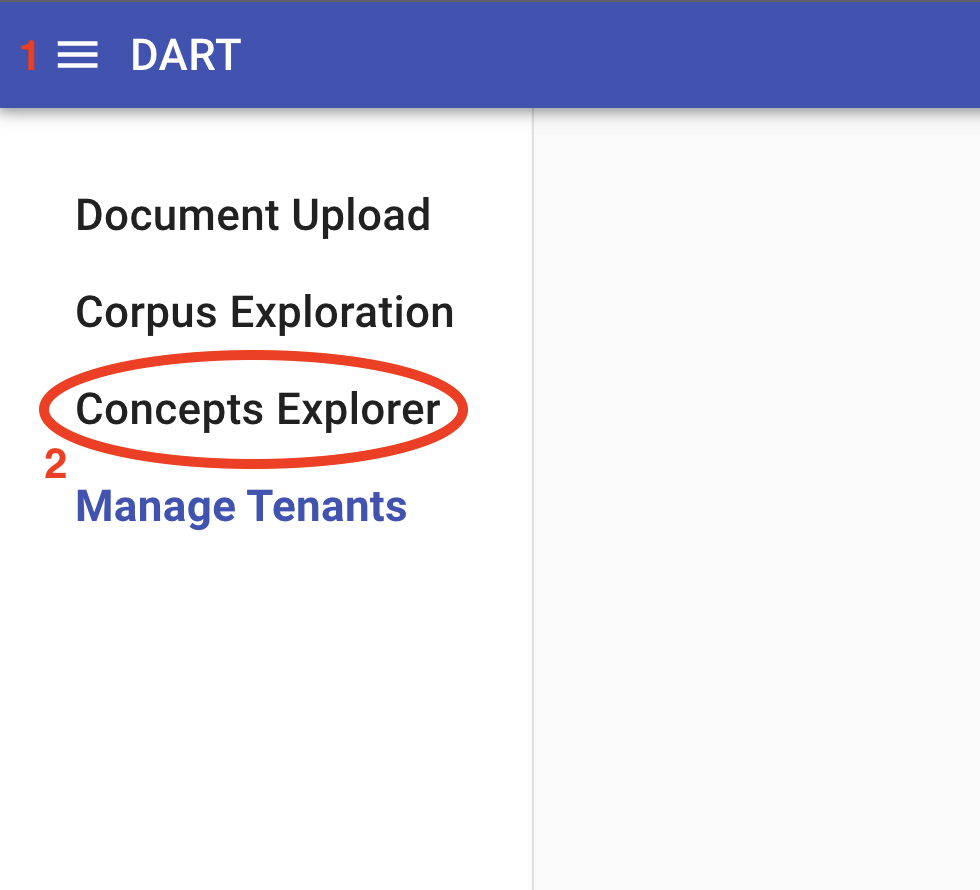
Once any tenants have been defined in DART, it is necessary to provide them with ontologies so that submitted documents can be read and assembled. To manage DART’s ontologies, the user can navigate to the Concepts Explorer tool in DART-UI. This tool can be accessed by opening the toolbar menu and clicking “Concepts Explorer” or by navigating to [base-url]/concepts:
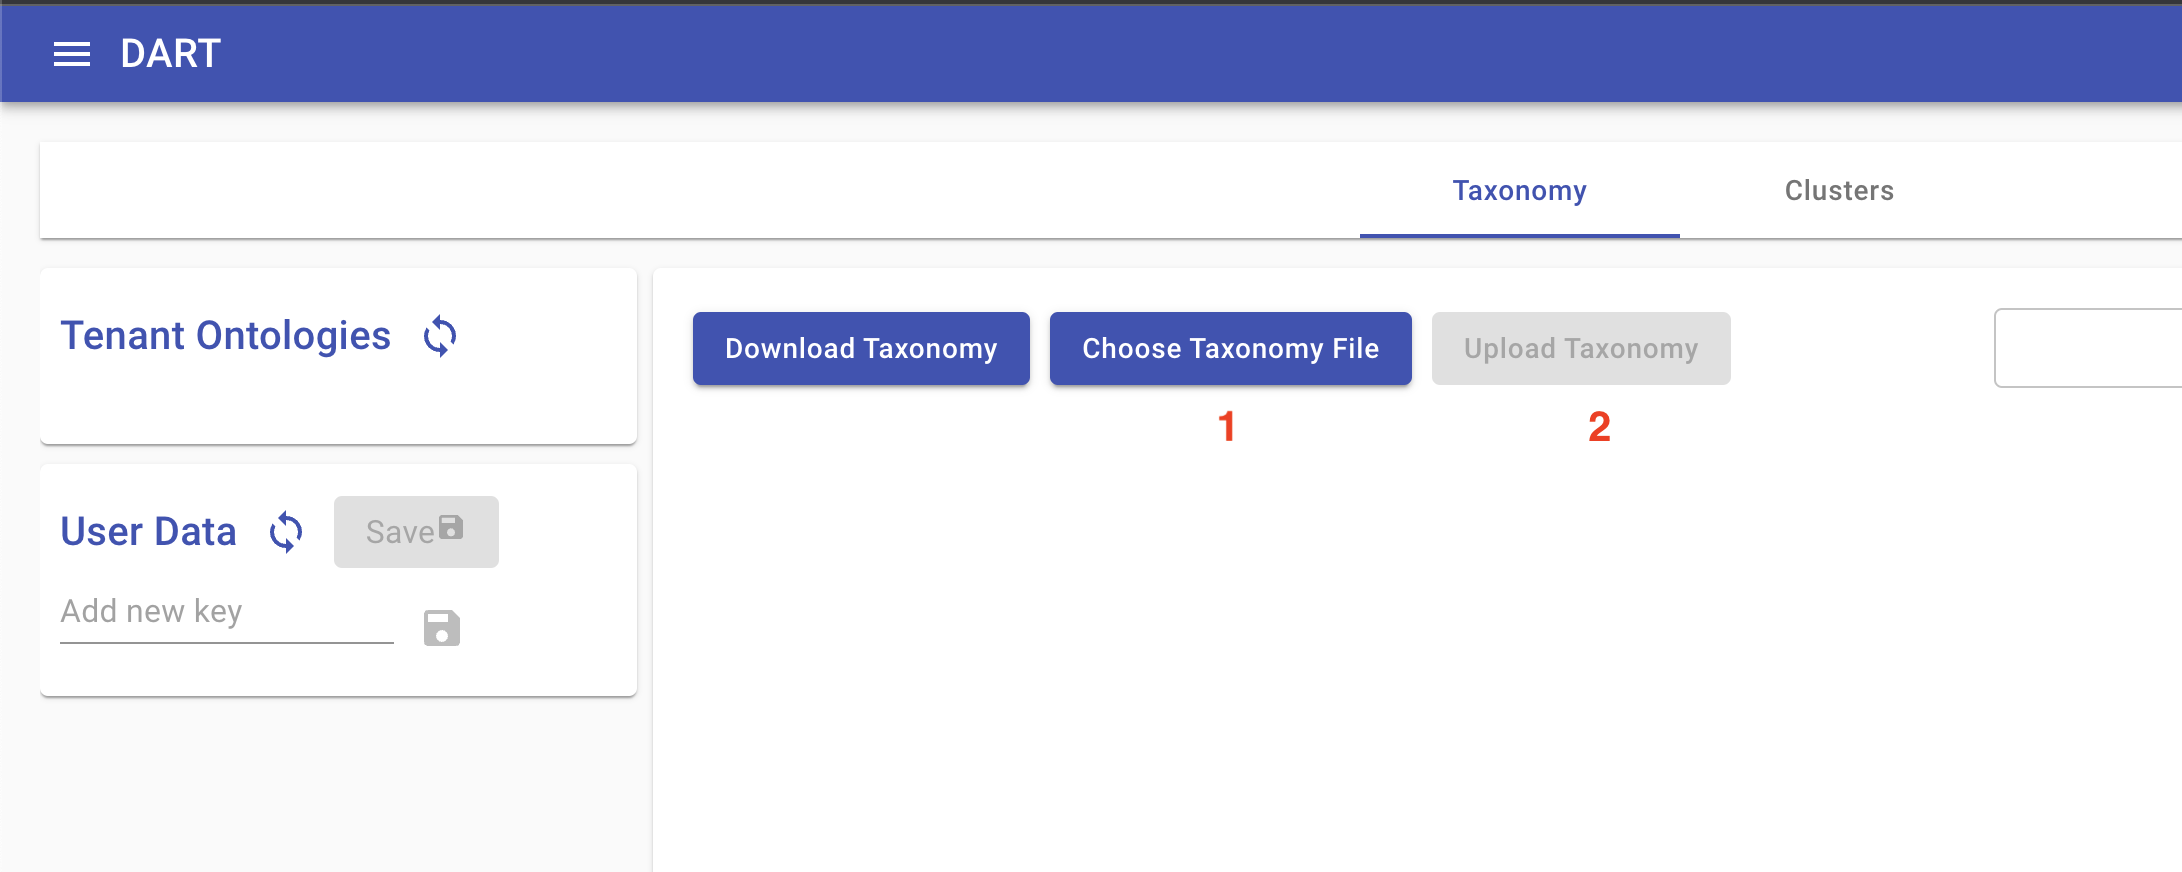
Concepts Explorer provides an ontology editor, which will initially be blank, and a panel allowing the user to access ontologies from each tenant as well as ontologies saved as user data for editing before publishing to a tenant. In the absence of any existing ontology, the user can either build one from scratch in the UI or upload an existing ontology in yaml format. (See World Modelers Ontologies.) To upload an ontology, click Choose Ontology File, and then Upload Ontology once you have selected the local ontology file:
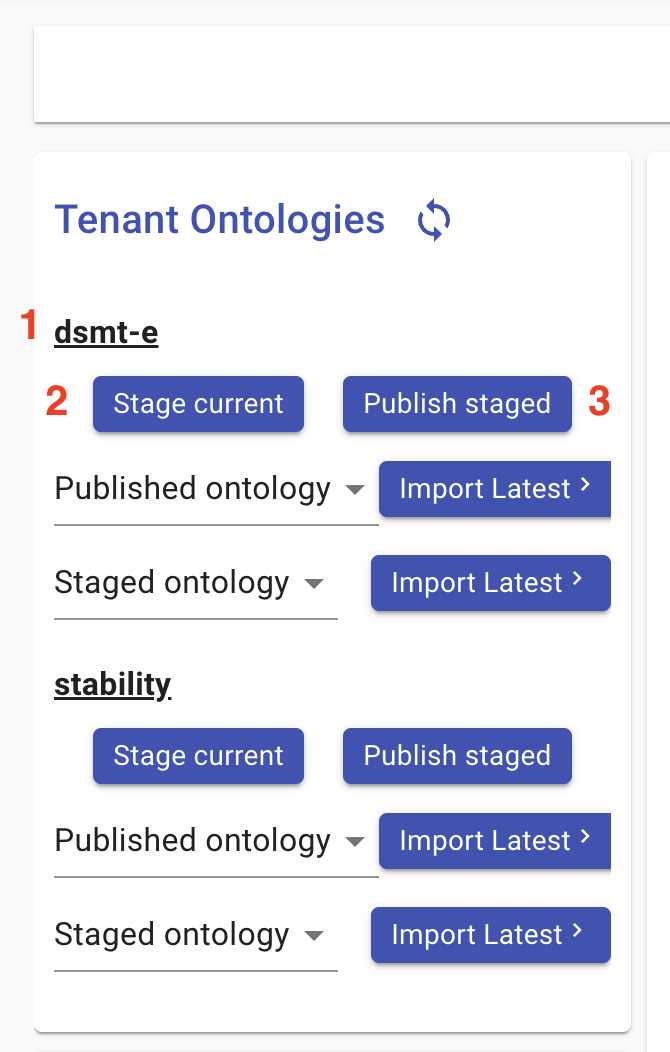
Once an acceptable ontology is loaded in the editor, the user can publish it to a tenant by doing the following:
- Find the desired tenant in the top-left panel labeled “Tenant Ontologies”
- Click “Stage current”
- Click “Publish staged”
It is also possible to defer this step until after document ingestion. Once an ontology has been published, all currently ingested documents will be resubmitted in bulk to the readers with the new ontology. Deferring ontology creation until after document ingestion makes sense if you plan to follow the “Ontology-in-a-Day” workflow, which depends on an existing corpus of documents.
4. Document Submission
Once an ontology has been published to a tenant, documents uploaded to that tenant will automatically propagate to the readers and will be assembled. For purposes of demonstration, you can find a sample collection of World Modelers documents to use here. Be sure to use the documents in the raws directory and not cdrs.
Documents can be uploaded in two ways:
A. Command line submission
To upload one or more documents via DART-CLI, use the forklift command:
dart -p [profile-name] --tenant [tenant-name] forklift submit [file 1] [file 2] ...
To upload an entire directory of files:
dart -p [profile-name] --tenant [tenant-name] forklift submit --input-dir [directory]
You can specify multiple tenants by repeated usage of the --tenant option.
Various kinds of metadata can be submitted along with the file, which will be incorporated into the document metadata within DART and propagated with document to the rest of the World Modelers system. This metadata can be specified via command-line options:
dart -p [profile-name] forklift submit \
    --tenant [tenant-name]
    --genre news-article \
    --label some-label \
    --label another-label \
    --input-dir [directory]
A. Web interface submission
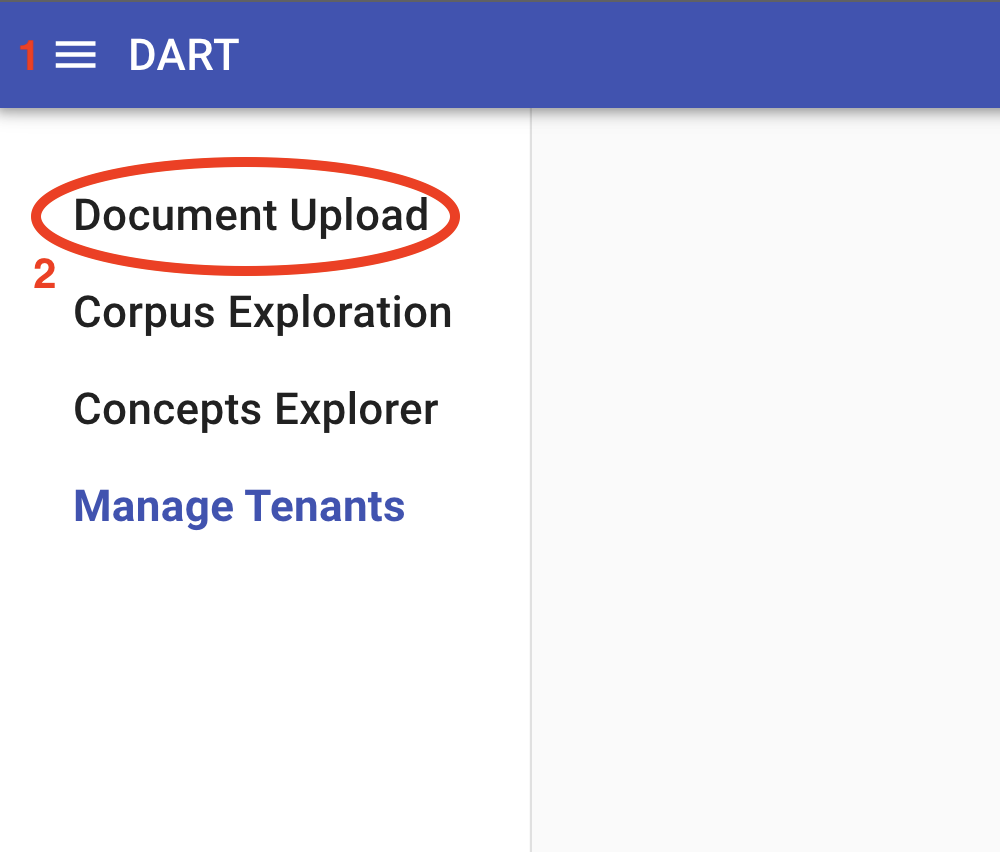
To upload a component via DART-UI, navigate to the Document Upload tool in DART-UI either by opening the toolbar menu and clicking “Document Upload” or by navigating to [base-url]/forklift:
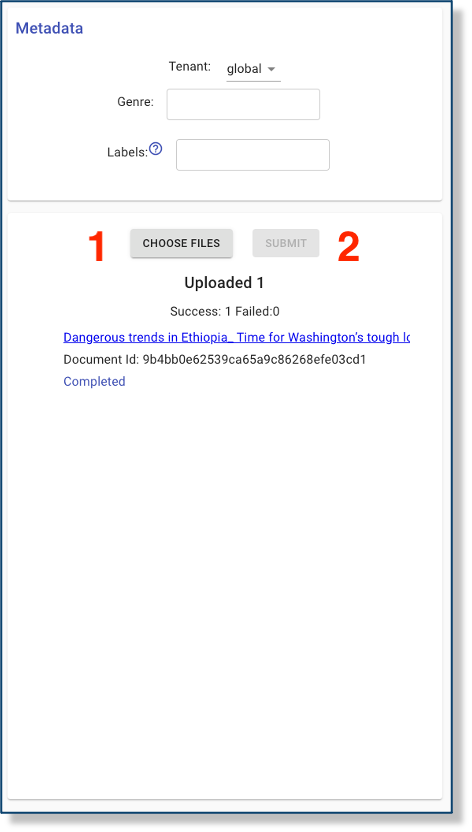
The panel at the top of the document upload tool allows the user to choose the target tenant, if there are more than one tenants to choose from, and set the genre and labels of the uploaded documents:

To select documents for upload, the user can click the button labelled “CHOOSE FILES”. The user can select one or more files, which will appear in the a list below the document selection and submission buttons. By clicking “SUBMIT,” the user will start the upload and should see the progress of each document as they are uploaded in sequence. Any zip archives will be expanded upon submission, and the user will see the individual archived documents in the document list. All documents uploaded in a single submission will have the same metadata set in the top panel.
After a document has been uploaded, the user should see the document’s id (a 32-character string of letters and numbers) as well as a status message that will proceed from Staged to Processing to Annotating to Complete. Once it has begun Processing, the filename should become a link that the user can follow to examine the document’s extracted text, metadata, and other preliminary extractions. At this point, the document will also be propagated to the readers.
Failed Document Submission
Some documents may not be processed due to corrupt data or unsupported formats (e.g., DART does not perform OCR extraction). Documents that fail extraction can be found in data/forklift/inbound.
If you are uploading via the web UI, you will see a FAILED status under the document id in the document upload interface.
5. Ontology in a Day (Optional)
DART includes a set of tools for rapidly building or extending an ontology by a process of concept discovery and clustering, which extracts clusters of semantically similar relevant clusters from an ingested corpus and exposes them to the user in a manner that allows efficient incorporation into the taxonomy.
This tool can be accessed by navigating to Concepts Explorer and clicking on the Clusters tab at the top of the screen:
Prior to clustering, the Clusters view will display a loading spinner as it tries to load non-existant clusters. To generate clusters, click the “Discover Concepts” dropdown and select the tenant that you wish to build your taxonomy against (select “global” to use all documents). Clicking the confirmation button in the subsequent popup will kick off the initial clustering process.
At this point you should see the loading spinner again. Once the clustering process is complete, the spinner should be replaced by a new clustering display. Use the navigation buttons at the top of the view to browse through the clusters and, when desired, reject the current cluster on the way.
Use the cluster panel to view the concepts within the current cluster and accept or reject them. Accepting a cluster will by default create a new concept within the working taxonomy within a root-level branch called “clusters”. The new concept’s name will be the most highly ranked concept within the cluster. To choose a different concept as the representative name, click the label icon next to the desired concept within the cluster.
To add clustered concepts to existing concepts within the taxonomy, use the tools to the right of the cluster. The clustering service provides a list of concepts within the taxonomy most likely to correspond to the current cluster. These are displayed in a list; clicking one will display the concept node in a separate panel to the right. Once a node is selected, concepts accepted from a cluster will be added to it as “examples.” You can also search for existing nodes in the taxonomy by typing keywords in the search box above the list of recommended nodes.
After making substantial changes to the taxonomy through cluster curation, the current taxonomy will depart substantially from the taxonomy used during the initial clustering. There are several consequences of this: first, the recommended nodes provided by the clustering service may not correspond to nodes in the current taxonomy; second, the recommended nodes might not reflect new nodes in the taxonomy that might be more similar to the current cluster; and finally, the scoring of clusters will be inaccurate. To bring the clustering output in line with the current state of the taxonomy, click the refresh icon on the right-hand side of the control buttons at the top of the clustering view.
Once the current list of clusters has been curated to your satisfaction, you can click the “Recluster” button at the top the clustering view to start a new job to recluster all of the concepts that haven’t been accepted or rejected. This process should take a few minutes. When the new clusters appear, you can repeat the above steps as many times as needed until you are confident you have incorporated all relevant clusters into your taxonomy.
When the curation process is complete, return to the taxonomy view by clicking the “Taxonomy” tab at the top of the screen. From there you can publish the taxonomy to the desired tenant by following the steps detailed in Ontology Management above.
Reading + integration/assembly
The instructions for deploying and using DART for ingestion, reading, and assembly are no different than the above instructions for the integrated system.
Ingestion only
To run DART without reading and assembly, follow the instructions for deploying DART in the Integrated System section, but add the flag --diab to the DART-CLI command.]